Creating personal websites does it hard? And Costing?
As we’ve all seen, especially after COVID-19, many IT companies have embraced remote work, opening up opportunities to hire developers from around the world. After I started exploring new opportunities and growing in my professional career, I went through many interviews. A common question from hiring managers was whether I had a repository where they could find my articles, code, or projects. The Problems I Faced:
- Organization: I was often unorganized and rarely pushed my work to GitHub or saved it to the cloud.
- Web Development Skills: As an embedded software developer, I was far removed from the world of web design and web development. However, I do have Python programming skills, so I thought, “Why not build my website using Python?” After some research, I discovered Django. Django stood out as a highly recommended web framework, and after reading the documentation and following the tutorial, I realized it’s surprisingly simple to create your own website with it.
Why This Guide?
If you’re like me with base knowledge in web-developing. If you want to quickly and efficiently create a website to showcase your work to hiring managers or share it on LinkedIn or also you want to create your own blog—you’re in the right place.
Let’s get started by setting up our environment.
Setting Up your environment :
For my side im using windows.
1. Install python:
Install Python using the Microsoft Store:
- Go to your Start menu: (lower left Windows icon), type "Microsoft Store", select the link to open the store.
- Once the store is open, select Search from the upper-right menu and enter "Python". Select which version of Python you would like to use from the results under Apps. We recommend using the most recent unless you have a reason not to (such as aligning with the version used on a pre-existing project that you plan to work on). Once you've determined which version you would like to install, select Get.
- Once Python has completed the downloading and installation process, open Windows CMD using the Start menu (lower left Windows icon). Once CMD is open, enter Python --version to confirm that Python3 has installed on your machine.
C:\Users\ridhaos\> Python --version
- The Microsoft Store installation of Python includes pip, the standard package manager. Pip allows you to install and manage additional packages that are not part of the Python standard library. To confirm that you also have pip available to install and manage packages, enter pip --version
C:\Users\ridhaos\> pip --version
2. Install visual studio code.
- By using VS Code as your text editor / integrated development environment (IDE), you can take advantage of IntelliSense (a code completion aid), Linting (helps avoid making errors in your code), Debug support (helps you find errors in your code after you run it), Code snippets(templates for small reusable code blocks), and Unit testing (testing your code's interface with different types of input).
- VS Code also contains a built-in terminal that enables you to open a Python command line with Windows Command prompt, PowerShell, or whatever you prefer, establishing a seamless workflow between your code editor and command line.
- To install VS code, you can download it from Here.
- Once VS Code has been installed, you must also install the Python extension. To install the Python extension, you can select the VS Code Marketplace link or open VS Code and search for Python in the extensions menu (Ctrl+Shift+X).
- Python is an interpreted language, and in order to run Python code, you must tell VS Code which interpreter to use. We recommend using the most recent version of Python unless you have a specific reason for choosing something different. Once you've installed the Python extension, select a Python 3 interpreter by opening the Command Palette (Ctrl+Shift+P), start typing the command Python: Select Interpreter to search, then select the command. You can also use the Select Python Environment option on the bottom Status Bar if available (it may already show a selected interpreter). The command presents a list of available interpreters that VS Code can find automatically, including virtual environments. If you don't see the desired interpreter, see Configuring Python environments.
Start Creating Your Website:
It’s Time to get our hands dirty, i hope your are motivated to start but before getting start we need to create our virtual environment, why we need to use virtual environment because : Virtual environments let you have a stable, reproducible, and portable environment. And as we will deploy our website it’s very easy to porting our website after.
- Start by creating a folder where you want to save your work.
- After open Command Line window by writing CMD into directory path(Show image below)

- CMD window will be opened, start by writing the following command:
C:\Users\ridhaos\myWebsite>python -m venv.
- Here using python module venv to create virtual environment to the current directory.
- Now you will see some folders created that’s mean your virtual environment is ready.
- Now start our environment:
C:\Users\ridhaos\myWebsite>Scripts\activate.bat
- After activate our virtual environement you can see parenthesis add it at the beginner.
- So, now we will install the requirements python libraries.
(myWebsite) C:\Users\ridhaos\myWebsite>pip install django markdown pillow
- django : django framework to create our website.
- markdown : markdown framework help us to convert markdown to html.
- pillow : to add image to our website.
Create Django Project
Now, let's create our website project by running this command:
(myWebsite) C:\Users\ridhaos\myWebsite>django-admin startproject myPortfolio
Open myPortfolio directory with VS code by command line:
(myWebsite) C:\Users\ridhaos\myWebsite>cd myPortfolio & code .
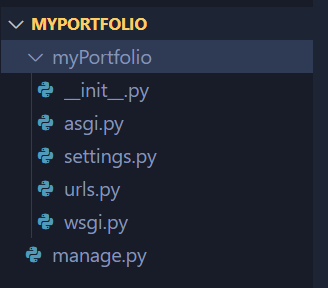
After creating our project now let's now create application for my side i called blog:
(myWebsite) C:\Users\ridhaos\myWebsite>python manage.py startapp blog
After finishing = you will see blog directory created with python defined files.
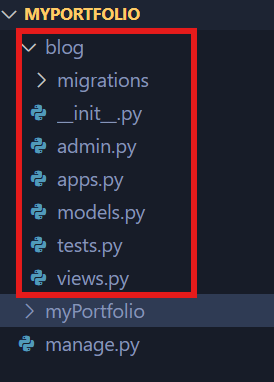
Let's start by Adding our blog application to our project:
- Open setting.py under myPortfolio\myPortfolio.
- Add blog to INSTALLED_APPS = [...]:
INSTALLED_APPS = [
    'django.contrib.admin',
    'django.contrib.auth',
    'django.contrib.contenttypes',
    'django.contrib.sessions',
    'django.contrib.messages',
    'django.contrib.staticfiles',
    'blog',
]
- Add at the end of setting.py configure media repository for images:
# Media files
import os
MEDIA_URL = '/media/'
MEDIA_ROOT = os.path.join(BASE_DIR, 'media')
- Open urls.py under myPortfolio\myPortfolio, and update it like below:
from django.contrib import admin
from django.urls import path, include

urlpatterns = [
    path('', include('blog.urls')),
    path('admin/', admin.site.urls),
]
After updating urls.py and setting.py we already configured our project, now let's continue to configure our blog application.
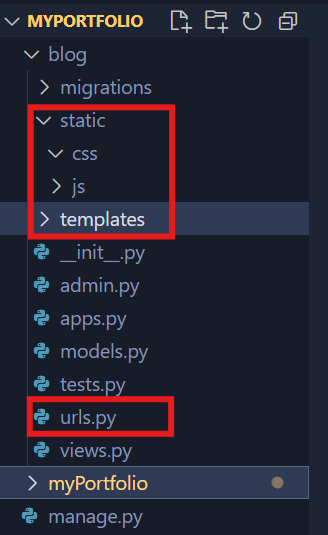
- add urls.py file under myPortfolio\blog.
- add templates and static directories under myPortfolio\blog.
- under static add two directories js and css
Your repository now must be like the photo below:
Start developping our blog app
All configuration and setting up project done, now the most important part of this tutorial. let's start by define our models (Data base model):
- Open models.py under myPortfolio\blog and create your model like this:
from django.db import models
from django.contrib.auth.models import User
from django.dispatch import receiver
from django.db.models.signals import pre_delete

STATUS = ((0, "Draft"), (1, "Published"))

# Create your models here.
class Post(models.Model):
    title       = models.CharField(max_length=256, unique=True, blank=False)
    slug        = models.SlugField(max_length=256, unique=True, blank=False)
    author      = models.ForeignKey(User, on_delete = models.CASCADE, related_name='blog_posts')
    created_at  = models.DateTimeField(auto_now_add=True)
    updated_at  = models.DateTimeField(auto_now=True)
    content     = models.TextField()
    tag_tech    = models.CharField(max_length=200, blank=True, null=True)
    status      = models.IntegerField(choices=STATUS, default=0)
    image       = models.ImageField(upload_to='post_images', null=False, blank=False)
    link_github = models.CharField(max_length=500, unique=True, blank=True, null=True)

    # Create Filter class for ordening shows
    class Meta():
        ordering = ['-created_at']

    # Create method return text field
    def __str__(self):
        return self.title

@receiver(pre_delete, sender=Post)
def delete_post_image(sender, instance, **Kwargs):
    instance.image.delete()
I create my class Post which contains (title, slug, author, created_at, updated_at, content, tag_tech, status, image, link_github) fields. and the last part of the code we define function called def delete_post_image(...): and this function used when we delete the from data base a Post the image delete also from directory.
Now we will create our templates, templates in django framework means html pages. We will start by adding 4 html files under myPortfolio\blog\templates:
- index.html : which is the entry html page or home page for our website.
- post_list.html : which is the the page that shows all our posts or articles.
- post_detail.html : which is the page that shows in details our post.
- base.html : which is the page that holds the main look-and-feel of your site, to do not repeat yourself.
from github project page copy the content of index, post_list, post_detail and base to your files.
Copy also css files, js file and /media/assets photo under the same repository as you these file to make our templates more beautifull.
"Please dont judge my webdesign its template that i download it from internet and update it, feel free to use any template you want or, you can use my template."
So, after configure it our templates now its time to go to the last step which is make all connected.
In this step need we will connect our templates to our views*, views in django mean connect getting data from database and send it back to templates. Open views.py** and add the following code:
from django.shortcuts import render
from django.views.generic import ListView, DetailView
from .models import Post
import markdown

# Create your views here.
class HomePage(ListView):
    template_name = 'index.html'
    model = Post

    def get_queryset(self):
        return Post.objects.filter(status=1).order_by('-created_at')

class PostList(ListView):
    template_name = 'post_list.html'
    model = Post

    def get_queryset(self):
        return Post.objects.filter(status=1).order_by('-created_at')

class PostDetailView(DetailView):
    model = Post
    template_name = 'post_detail.html'

    def get_context_data(self, **kwargs):
        context = super().get_context_data(**kwargs)
        md = markdown.Markdown(extensions=["fenced_code", 'tables'])
        context['post'].content = md.convert(self.get_object().content)
        print(context['post'].content)
        return super().get_context_data(**kwargs)
Now, our views: HomePage, PostList, PostDetailView are configured. After the configuration of our views, the next step is to add urls and which url corresspond to one view, for this open urls.py and add the following code:
from django.urls import path
from django.conf import settings
from django.conf.urls.static import static
from . import views

urlpatterns = [
    path('', views.HomePage.as_view(), name="index"),
    path('blog/', views.PostList.as_view(), name="post_list"),
    path('blog/<slug:slug>/', views.PostDetailView.as_view(), name="post_detail"),
]

urlpatterns += static(settings.MEDIA_URL, document_root=settings.MEDIA_ROOT)
Also need to update admin.py under myPortfolio\blog by the following code:
from django.contrib import admin
from .models import *

# Make admin page more readable
class PostAdmin(admin.ModelAdmin):
    list_display = ('title', 'slug', 'status', 'author', 'created_at')
    list_filter = ('created_at',)
    search_fields = ['title', 'content']

    def save_model(self, request, obj, form, change):
        obj.title = obj.title.title()
        return super().save_model(request, obj, form, change)

# Register your models here.
admin.site.register(Post, PostAdmin)
The moment has come to test our website, go back to CMD and start running the following commands:
- Fetch database:
(myWebsite) C:\Users\ridhaos\myWebsite>python manage.py migrate
- Create Post Model and save it in database:
(myWebsite) C:\Users\ridhaos\myWebsite>python manage.py makemigrations
- Fetch another time the data base:
(myWebsite) C:\Users\ridhaos\myWebsite>python manage.py migrate
- Create superuser with user and password:
(myWebsite) C:\Users\ridhaos\myWebsite>python manage.py createsuperuser
- Run server:
(myWebsite) C:\Users\ridhaos\myWebsite>python manage.py runserver
If all good and you don't have any error you must see the result, by going to localhost server http://127.0.0.1:8000/ and you can see your website is created:
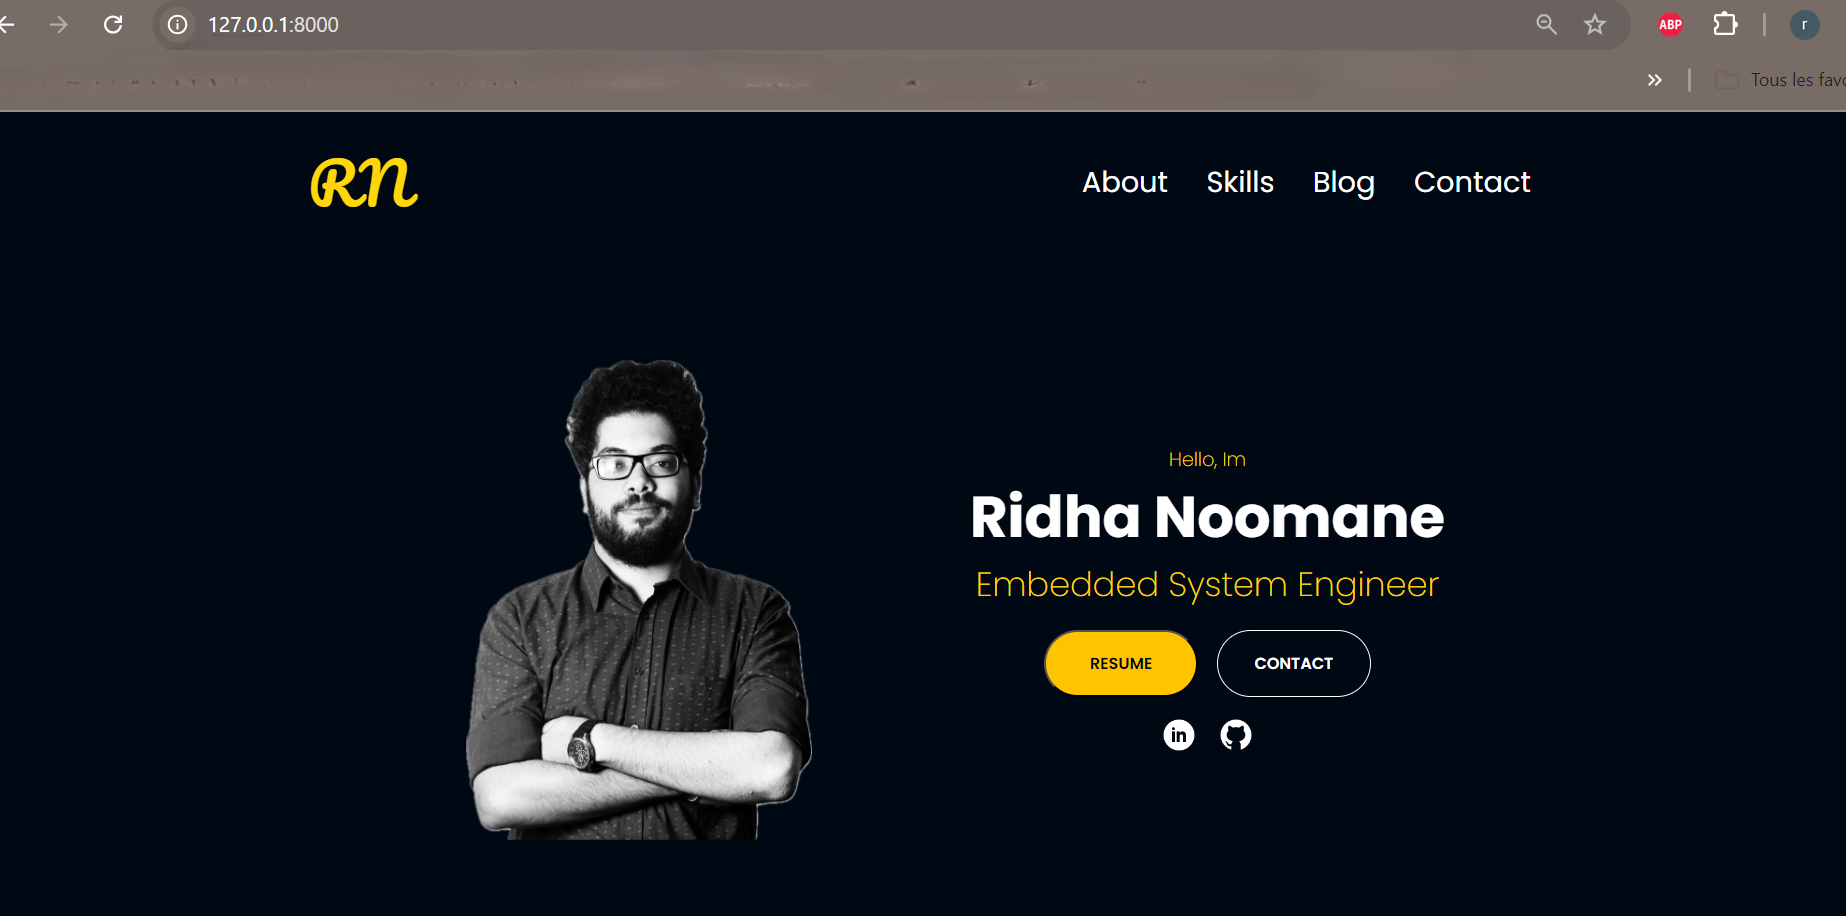
Congratulations!!! you website is ready...
Now the last part is to create a post, or article.
got localhost admin page: http://127.0.0.1:8000/admin
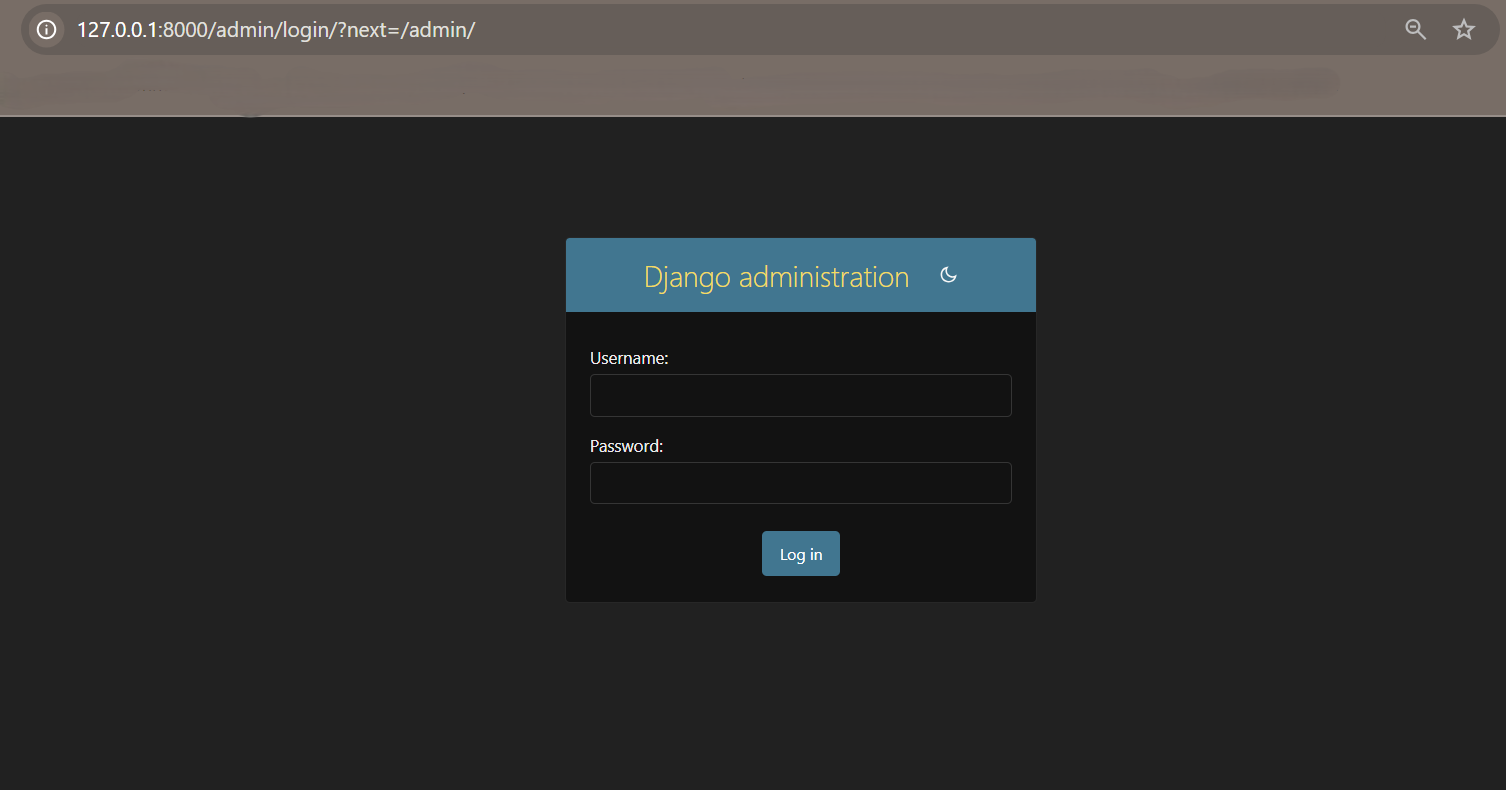
Connect using your user and password.
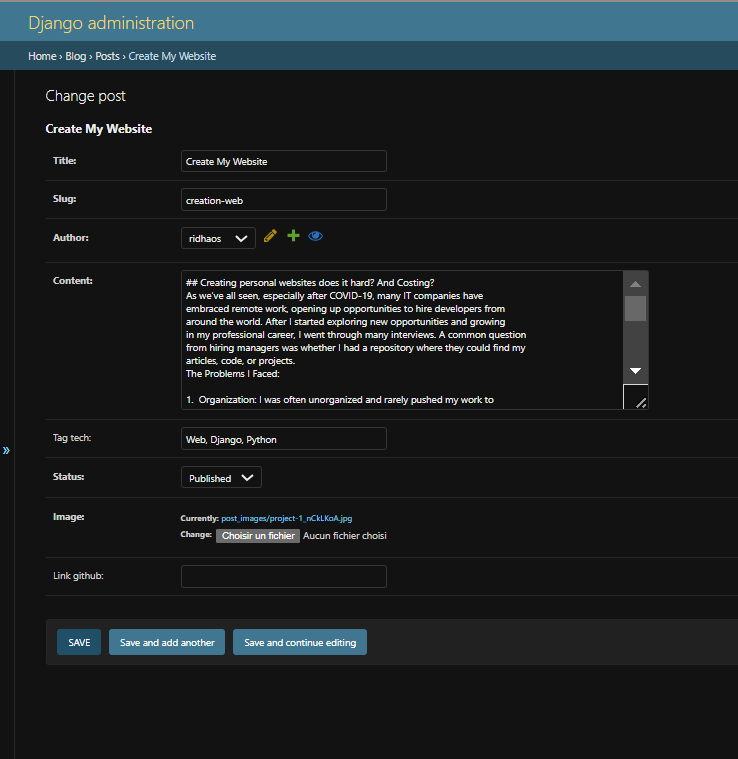
Go to post view and click on add post, fill the all field and
for content field try to styling your lines with markdown format.
and change the status to published, save and exit.
 Go back to your website, localhost http://127.0.0.1:8000/ and go to blog.
You will see your blog is already published.
Conclusion:
This tutorial was just introduction to show how you can make a website in less than one hour, and give an ideao how python is powerfull in this domain especially in web domain. If you are interresting about all details you can follow django tutorial HERE where is so rich very simple to understand it and go deep in details. I hobe by the end of this articles make you curious about django, webapplication, or maybe python.
